As the world becomes increasingly health-conscious, people are turning to microgreens as a convenient and nutritious way to add flavor and color to their meals. These young, nutrient-dense greens are perfect for salads, sandwiches, smoothies, and even as garnishes for a variety of dishes. But what makes them so appealing, and how can you grow them at home in just 7 days? Whether you’re a seasoned gardener or a beginner, this beginner’s guide will walk you through the steps to grow microgreens like a pro.
First Section: Choosing the Right Seeds and Equipment
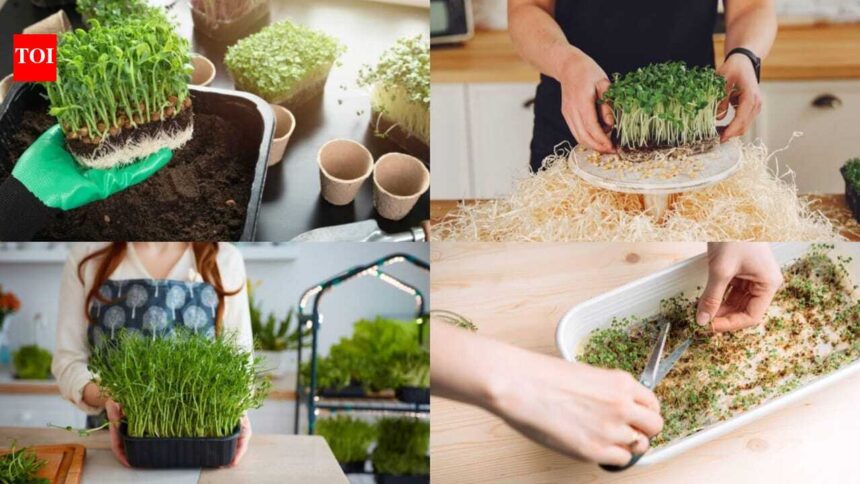
The first step to growing microgreens is to select the right seeds. Look for varieties that are specifically bred for microgreens, such as salad mix, kale, or radish. You’ll also need a container, soil, and grow lights or a sunny windowsill. Make sure your container has drainage holes to prevent waterlogged soil. A shallow tray or a plastic container with a capacity of at least 1-2 gallons will work well. For soil, choose a high-quality potting mix that’s designed for indoor growing.
Next, choose your grow lights or find a sunny spot that receives at least 4-6 hours of direct sunlight. If using grow lights, invest in a timer to ensure they’re on for the right amount of time. You’ll also need a spray bottle for watering and a tray or plate for harvesting.
Second Section: Sowing and Caring for Your Microgreens
Once you have your seeds, soil, and equipment, it’s time to sow your microgreens. Start by rinsing the seeds with water and then sow them evenly across the surface of the soil. Cover the seeds with a thin layer of soil and gently water them with a spray bottle. Make sure the soil is moist but not waterlogged. Place the tray under the grow lights or in a sunny spot and keep the soil consistently moist.
As your microgreens grow, you’ll need to water them regularly. Use the spray bottle to mist the soil with water, making sure not to overwater. You can also use a mister or a watering can with a fine nozzle. Keep the soil at a consistent temperature between 65-75°F (18-24°C) and maintain high humidity to promote healthy growth.
Third Section: Harvesting and Enjoying Your Microgreens
After 7 days, your microgreens will be ready to harvest. Use scissors to snip off the leaves at the base of the stem, just above the soil line. This will encourage the plant to produce more leaves and prevent it from flowering. Rinse the harvested microgreens with cold water and pat them dry with a paper towel. Use them immediately or store them in an airtight container in the refrigerator for up to 3 days.
With these simple steps, you can enjoy the nutritional benefits and flavor of microgreens in your favorite dishes. Whether you’re adding them to a salad, using them as a garnish, or blending them into a smoothie, microgreens are a delicious and healthy way to boost your diet.
So, what are you waiting for? Get growing and start reaping the rewards of your home-grown microgreens. With a little practice and patience, you’ll be harvesting fresh, flavorful microgreens in no time.